
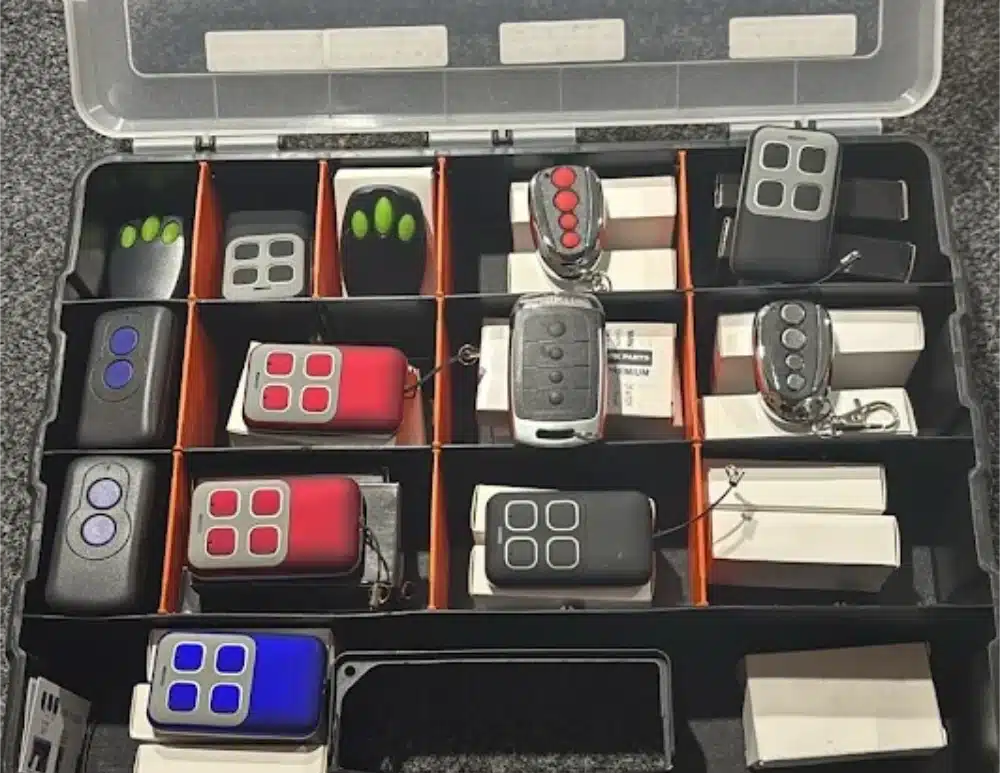
Resetting your garage door remote may seem like a small task, but it plays a critical role in maintaining the security and smooth operation of your garage door system. Whether your remote is unresponsive after a power outage or you’re syncing a new device to the opener, this guide walks you through the simple steps to reset, troubleshoot, and reprogram your garage door remote.
You can reset most garage door remotes in under two minutes once you locate the learn button on the garage door opener unit. This step-by-step guide for Perth and WA homes shows the simple steps to reset, reprogram and test a remote control, explains where to find the Learn button on common models and lists quick troubleshooting tips for poor range, sensor faults and interference.
Why is my garage door remote not working?
Most garage door remote problems come down to power, pairing, sensors or interference. Check these four basics first:
- Batteries: Open the remote, replace the cell and clean the contacts. Common sizes are CR2032, CR2016 and A23. Confirm the polarity before you close the cover.
- Range: Stand within 3 to 6 metres and press. Metal cladding, parked vehicles and steel sheds can block signal from the transmitter.
- Wall lock and control panel: If the wall button opens the door but the remote does not, the remote has lost pairing or the battery is flat. Make sure the wall “lock” is off.
- Safety sensors: Dirty or misaligned photo-eyes stop a garage door from closing, which can look like a remote fault. Clean the lenses and align them so the LED light on each sensor is solid.
Interference sources include cheap LED bulbs in the opener light, a Wi-Fi router sitting on the motor housing, solar inverters, and neighbours programming remotes. Swap the bulb for a garage-compatible LED and move routers away from the antenna wire.
Safety note: never adjust springs, cables or high-tension hardware on the opener. If the motor strains or the door runs off track, call a professional.
Can you reset a garage door remote without the opener?
For rolling-code systems you need access to the opener’s learn button to erase and re-pair. Legacy DIP switches are the exception. On those, the remote and receiver both use the same physical switch pattern. If the receiver is inside the motor head, you still need to open the lens or rear cover to match the switches with the remote.
How to reprogram a garage door remote
Follow this universal sequence used by most garage door opener brands.
How To: reset and reprogram a remote
- Replace the battery
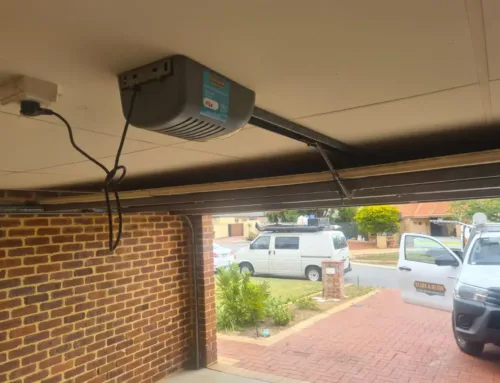
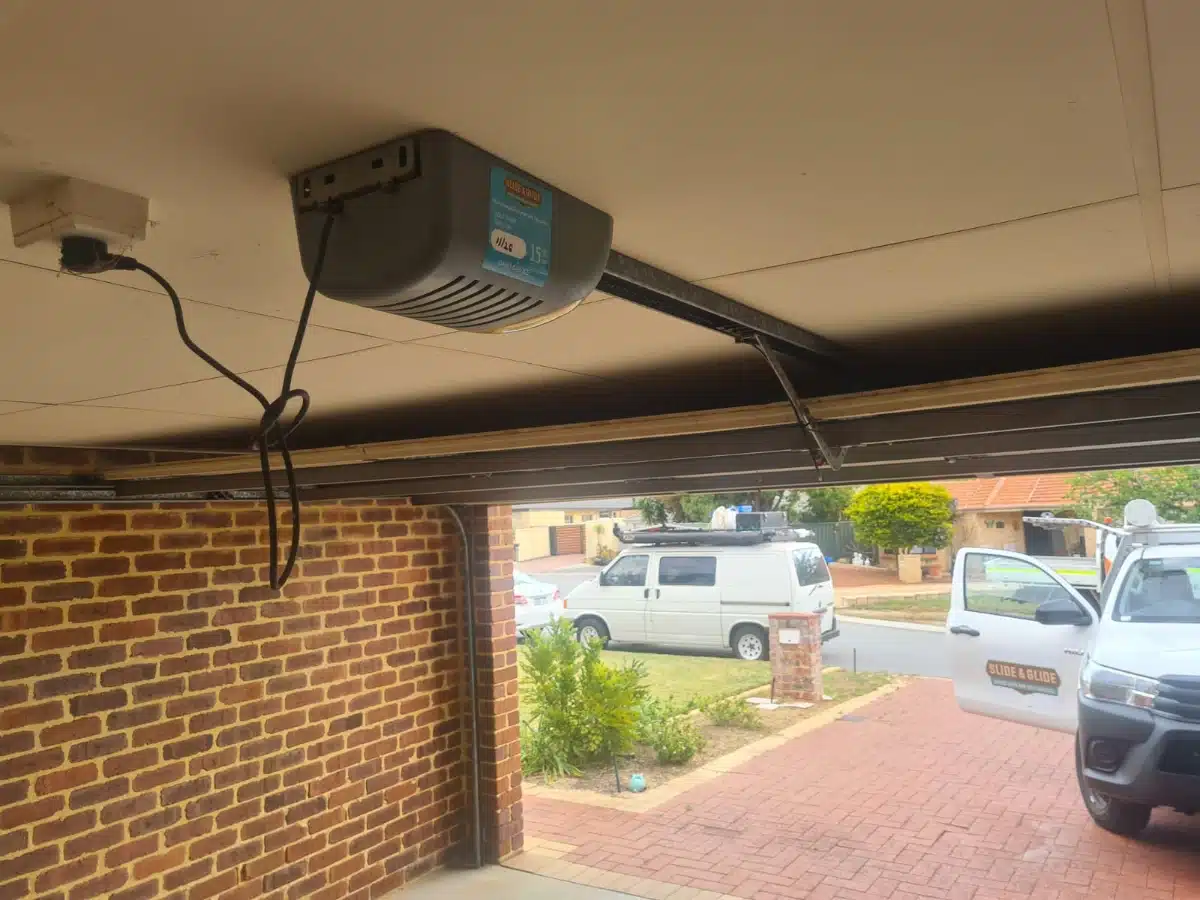
Fit a fresh CR2032, CR2016 or A23 and check the button has a firm click. - Locate the Learn button
On the opener head, lift the light lens or rear cover and find Learn near the antenna wire. Colours include yellow, purple, red or orange, and green. - Press Learn
Press and release Learn. You have about 30 seconds to pair. The Learn LED turns on or blinks. - Press the remote button
Press the remote button you want to use one to three times until the light flashes or the motor clicks. - Test operation
Stand clear and test open and close with the remote and the wall button. If your remote has more than one button, program the second button now.
Brand quick steps
LiftMaster
Pair a new remote
- Unclip the light lens on the opener.
- Locate Learn near the hanging antenna wire. The button is usually yellow, purple, red or orange, or green.
- Press and release Learn. The Learn light turns on or blinks. You now have about 30 seconds.
- Press the remote button you want to use. On some yellow Learn models you may need to press twice.
- Wait for the opener light to flash or the relay to click, then test open and close.
Full wipe and re-pair
- Hold Learn for 6 to 10 seconds until the Learn LED turns off or the light flashes. This clears all remotes and keypads.
- Re-pair every handheld remote, visor remote and keypad before you close the lens.
Notes
- If your car uses HomeLink, program it after the handheld remotes.
- Replace remote batteries first. Common cells are CR2032 or A23.
Chamberlain
Pair a new remote
- Remove the lens and find Learn next to the antenna.
- Press and release Learn.
- Press the remote button once or twice until lights flash.
- Test from 3 to 6 metres.
After a full wipe
- myQ openers may need the app re-linked after you clear codes. Open the myQ app and follow the add device steps.
- Keep both visor and handheld remotes on hand so you can pair all devices in one session.
Tip
- If range is poor, replace the opener bulb with a garage compatible LED and check the antenna wire hangs straight down.
Merlin
Pair a new remote
- Lift the light lens. Find Learn beside the antenna.
- Press and release Learn.
- Press and hold the remote button until the light flashes or the motor clicks.
- Test open and close.
Model specifics
- Security+ 2.0 models often require pairing each button separately.
- Older Merlin units with green or red Learn buttons usually accept a short three press sequence on the remote.
Clear all devices
- Hold Learn for 6 to 10 seconds until the Learn LED goes out. Re-pair every remote and the keypad.
B&D Garage Door Openers
Pair a new remote
- Open the light lens to reveal Learn.
- Press and release Learn.
- Press the remote once or twice until the opener flashes.
- Test from the door threshold.
Older B&D notes
- Some legacy heads use different timing. If the first attempt fails, repeat and vary the number of remote presses within the 30 second window.
- If your unit uses an add on receiver, the Learn button may be on the receiver module.
Clear all devices
- Hold Learn for 6 to 10 seconds until confirmation, then re-pair.
Gliderol Garage Door Openers
Pair a new remote
- Locate Learn near the antenna on the side or back panel.
- Press and release Learn.
- Press and release the remote button until the motor clicks or the light flashes.
- Test the door from a safe distance.
Legacy models
- Some older Gliderol heads use DIP switches. Match the tiny switch pattern inside the remote to the receiver. You may need to remove a small cover on the motor to view the receiver switches.
Clear all devices
- Hold Learn for 6 to 10 seconds to erase memory.
Avanti Garage Door Openers
Pair a new remote
- Unclip the light lens or rear cover on the motor head.
- Locate the Learn button near the antenna wire.
- Press and release Learn. The Learn light turns on or blinks. You have about 30 seconds.
- Press the remote button you want to use one to three times until the light flashes or the motor clicks.
- Test open and close from a safe distance.
Full wipe
- Hold Learn for 6 to 10 seconds until the Learn LED turns off or the light flashes. This erases all paired remotes and keypads. Re-pair each device immediately.
Older Avanti notes
- Some older heads use a plug-in receiver. If present, the Learn button will be on that receiver module.
- If the unit is very old, it may use DIP switches. Match the switch pattern in the remote to the receiver.
- If unsure, record the model number and Learn colour, or take a photo of the control label and antenna area.
Jaytech Garage Door Openers
Pair a new remote
- Open the lens or rear cover and find the Learn button beside the hanging antenna.
- Press and release Learn.
- Press the remote button until the opener light flashes or you hear a click.
- Test operation and program any extra buttons now.
Full wipe
- Hold Learn for 6 to 10 seconds to clear the memory, then re-pair all remotes, keypads and any car buttons in one session.
Older Jaytech notes
- Some legacy Jaytech models need an add-on receiver to support modern rolling code remotes.
- If you cannot see a Learn button, check for a small receiver box on the side of the motor. The Learn button will be there.
- Capture the model number and Learn colour to confirm compatibility.
Super Lift Garage Door Openers
Pair a new remote
- Remove the light lens or small top cover and locate Learn near the antenna.
- Press and release Learn.
- Press the remote one to three times until the light flashes or the relay clicks.
- Test open and close from 3 to 6 metres.
Full wipe
- Hold Learn for 6 to 10 seconds until the Learn LED goes out. Re-pair remotes and the keypad immediately.
Older Super Lift notes
- Some models shipped with fixed-code receivers. These may need a universal rolling-code receiver upgrade.
- If pairing fails, try again within the 30 second window and vary the number of button presses.
- Note the model number and Learn colour, or send a photo of the control label and antenna area for matching.
Steel Line Garage Door Openers
Pair a new remote
- Unclip the lens. Find the Learn button next to the antenna wire.
- Press and release Learn.
- Press the remote button until the opener confirms with a flash or click.
- Test the door and pair any additional buttons now.
Full wipe
- Hold Learn for 6 to 10 seconds until the indicator goes off. This clears all devices. Re-pair your remotes, keypad and any car-integrated buttons.
Older Steel Line notes
- Some older Steel Line heads use external receivers or DIP switches. If you see a tiny bank of switches, copy that pattern into the remote.
- Where no Learn is visible on the head, look for a small receiver module and use its Learn.
- Record the model number and Learn colour so we can supply a compatible remote or receiver quickly.
How to clear codes from a garage door opener
Hold the Learn button for 6 to 10 seconds until the light flashes or the Learn LED turns off. This clears every paired remote, car transmitter and keypad. Re-pair your devices immediately so the system can operate from outside again. Do this after you lost a remote or when you move into a new home.
Do I need to reset the opener after replacing the remote?
Yes. A new remote control must be paired to the garage door opener model via Learn. You do not have to wipe existing remotes unless one is missing. Keep a simple note of how many devices should be active.
How to reset a keypad and remote together
- Clear the opener memory with a 6 to 10 second press of Learn.
- On the keypad, enter a new 4-digit PIN and press and hold Enter until the light flashes.
- Pair each remote using the standard Learn sequence.
If a side-mount keypad is intermittent, replace its coin cell and the weather seal.
What causes remotes to stop working?
- Battery failure or corroded contacts inside the device
- Antenna wire cut short or tucked up instead of hanging down
- Erased memory after a power event
- Misaligned safety sensors
- Interference from bulbs, routers or solar equipment
- Cracked cases or water-damaged PCBs
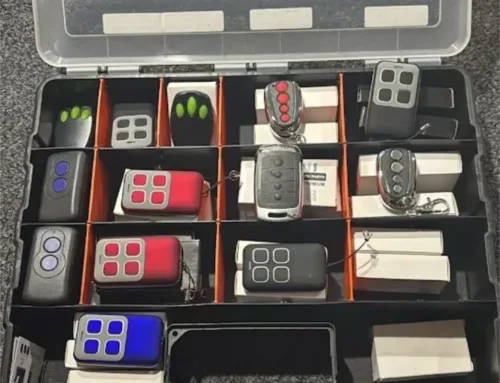
What universal remotes work with older openers?
Choose multi-frequency universal garage remote models that support your opener’s protocol and Learn colour. Match by manufacturer, frequency and Security+ rolling code standard. Do not mix DIP switches and rolling code without the correct bridge module.
Should I replace or reset a garage door remote?
Use a reset for lost pairing and range glitches. Replace when the casing is cracked, buttons are worn, the PCB is water-damaged, or the remote is unresponsive even with fresh batteries. Replacement cost is modest compared with repeated, costly repairs. If you want phone control, add a smart controller such as myQ.
Can I reprogram after losing a remote?
Yes. Wipe the opener memory to revoke the lost remote, then re-pair your other remotes and the keypad. Change the keypad PIN and re-set any car-integrated remotes such as HomeLink. Record how many remotes are active when you finish.
Are rolling code remotes harder to reset?
No. Rolling-code remotes pair via Learn in seconds. The code updates automatically after programming to prevent replay attacks. DIP systems need you to match the tiny switches inside both the remote and the receiver.
Tools you will need
A step ladder, fresh cells (CR2032, CR2016 or A23), a torch, and a phone camera to record Learn light timing. Avoid metal tools near the antenna. If the door fails to operate smoothly after pairing, call a professional to check the system balance rather than increasing opener force.
How secure are garage door remotes today?
Modern rolling-code remotes are secure when paired correctly and kept dry. Replace remotes after water damage and keep photo-eyes clean and aligned. Test auto-reverse monthly from the wall control.
Where can I buy a replacement garage door remote?
Buy from a Perth dealer so the model number, frequency and learn button colour match. Bring a photo of the motor head and the control panel label. Ask for on-site programming if the opener is hard to reach.
Can I book remote programming or troubleshooting today?
Yes. Same-day programming is available for stocked brands in metro areas. Confirm safe access to the opener head and we will combine programming with a sensor and force check.
FAQs
How do I reset my garage door remote?
Press Learn on the opener, then press the remote button until the light flashes. Test open and close.
Where is the Learn button?
Under the light lens or rear panel near the antenna wire. Colours include yellow, purple, red or orange, and green.
How do I wipe all remotes if one is lost?
Hold Learn for 6 to 10 seconds to erase memory, then re-pair remotes and keypad.
Do I need a new remote or just a reset?
Reset for pairing drops. Replace if the remote is cracked, water-damaged or still unresponsive with new batteries.
Will a universal remote work with my opener?
Yes if it supports your opener’s frequency and security protocol. Match by brand, frequency and Learn colour.
How to Reset Garage Door Remote Final Thoughts
If your garage door remote has stopped working after a power cut or is not responding, our Perth team can pair and program remotes, replace faulty handsets, repair openers and add secure smart access.

- How To Keep Your Garage Door Running Longer - May 10, 2026
- How To Insulate Your Garage Door - May 10, 2026
- How To Program A Merlin Garage Remote - April 14, 2026
Social Media